Basic Guide
Everything you need to know to get started with Autoblogging.pro. From login to your first published article.
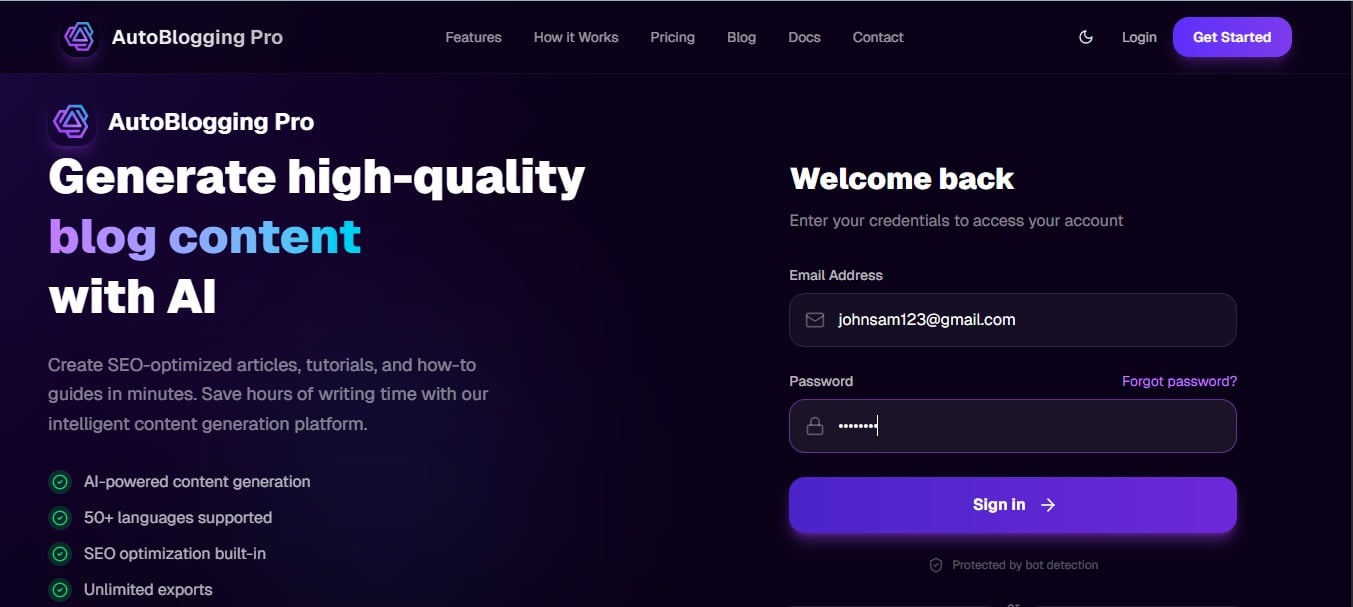
Login to Your Account
Access your Autoblogging.pro dashboard using your credentials.
What to Do
- Navigate to https://autoblogging.pro/login
- Enter your email and password
- Click 'Sign In' to access your dashboard
- If you don't have an account, click 'Create Account'
Pro Tips
- 💡Use a strong password and enable 2FA for security
- 💡Bookmark the login page for quick access
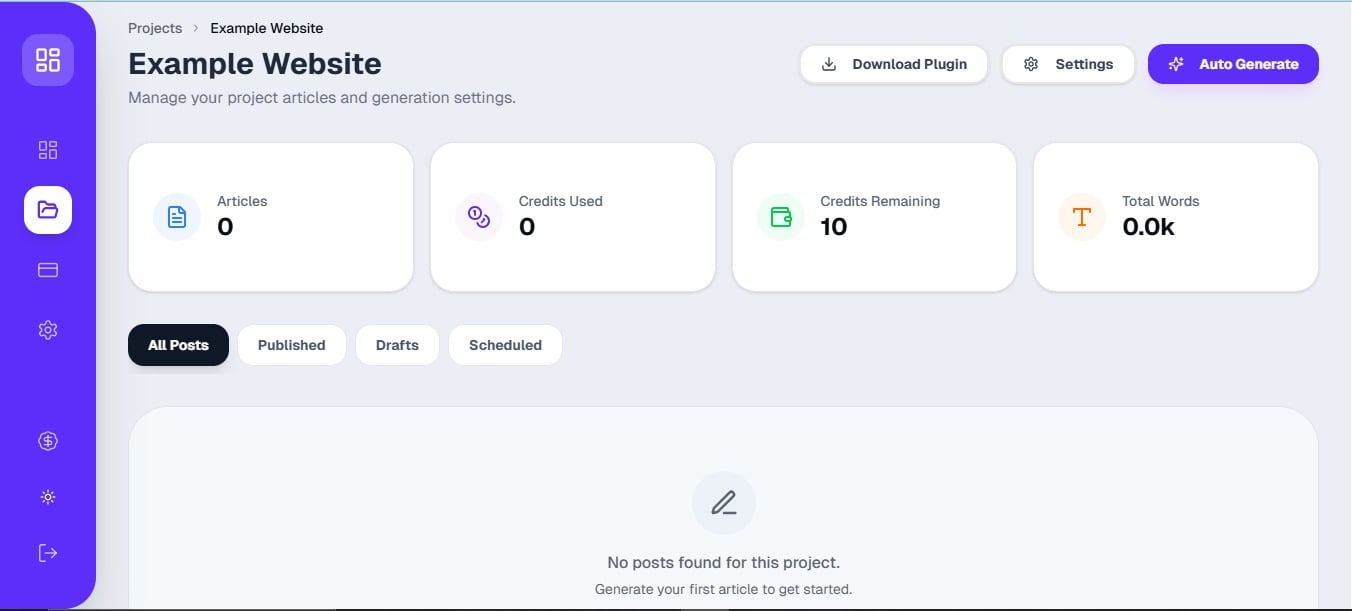
Create Your First Project
Set up a new autoblogging project in just a few minutes.
What to Do
- Click 'New Project' on your dashboard
- Enter your website domain (e.g., yourblog.com)
- Select your project category (Blog or E-Commerce)
- Choose your primary language
- Configure description and goals
Pro Tips
- 💡Make sure your domain is accessible (not blocked by robots.txt)
- 💡Choose the category that best matches your content type
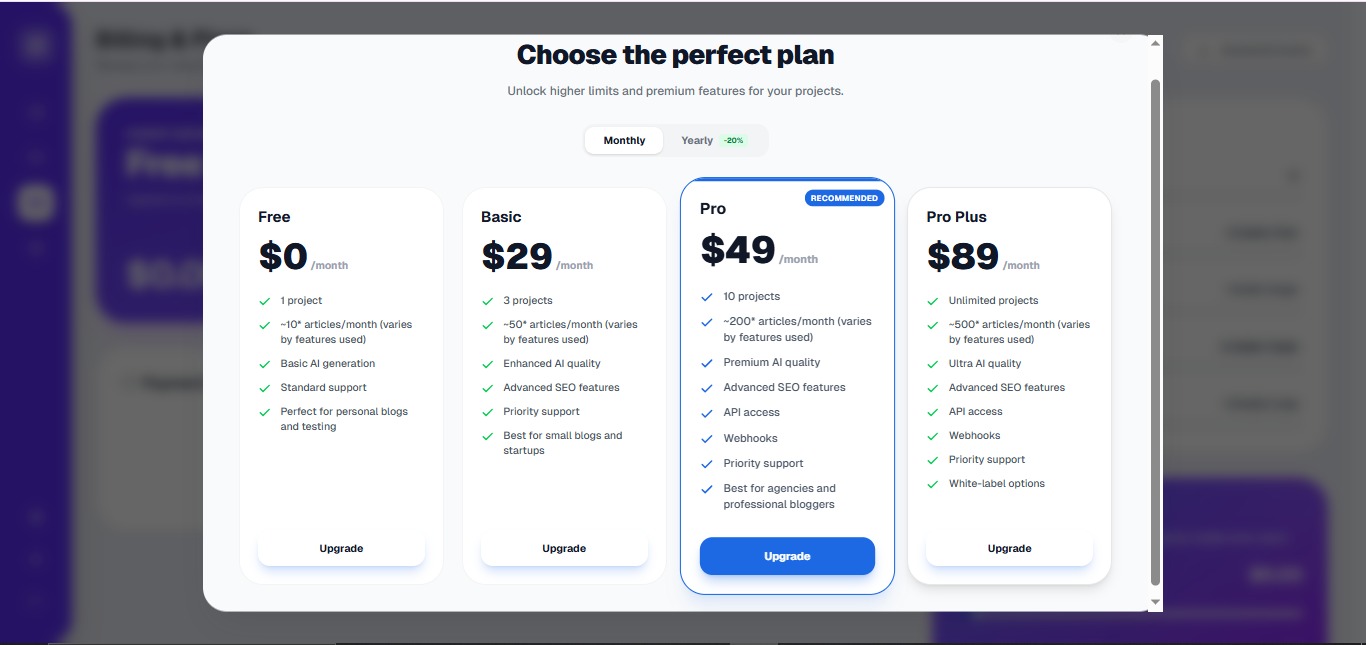
Understanding Dynamic Plans
Autoblogging.pro offers flexible plans that scale with your needs.
What to Do
- Free Plan: 1 project, ~10* articles/month
- Basic Plan: 3 projects, ~50* articles/month
- Pro Plan: 10 projects, ~200* articles/month
- Pro Plus Plan: Unlimited projects, ~500* articles/month
- *Actual article count varies based on AI images, translations, and features used
- Credits roll over to next month (up to 2x your limit)
Pro Tips
- 💡You can upgrade/downgrade anytime
- 💡Annual billing saves you 20%
- 💡Contact support for custom enterprise solutions
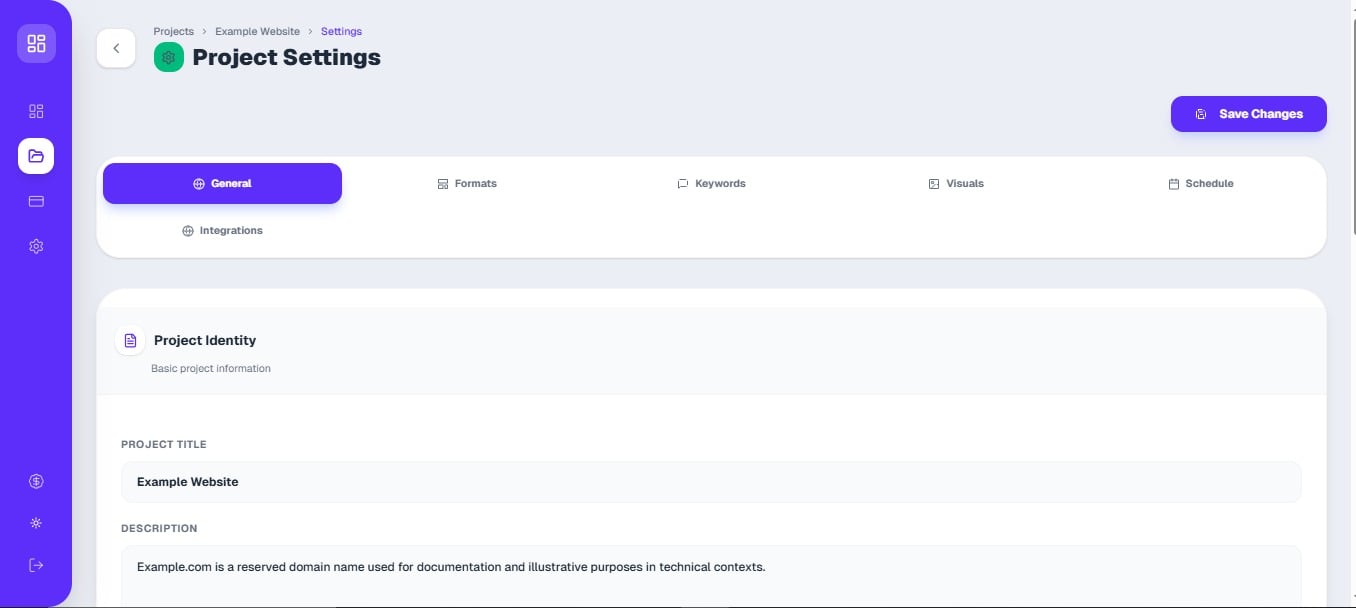
Configure Project Settings
Fine-tune your project settings for optimal content generation.
What to Do
- Set article types (How-to, Listicles, Reviews, etc.)
- Define keywords and clusters for SEO
- Configure featured image settings (AI or OG images)
- Set up publishing schedule
- Enable auto-internal linking
Pro Tips
- 💡Start with 3-5 primary keywords per project
- 💡Use a mix of article types for variety
- 💡Schedule consistent posting for better SEO
Generate Your First Article
Watch Autoblogging.pro create your first SEO-optimized article.
What to Do
- Go to your project dashboard
- Click 'Generate Article'
- Select article type and keywords
- Review AI-generated content
- Edit, approve, or regenerate as needed
- Publish or schedule for later
Pro Tips
- 💡Always review AI-generated content before publishing
- 💡Add your own voice and personal touch
- 💡Use the 'Regenerate' button for different variations
Why Quality Content Matters
Learn how high-quality articles boost your business, comply with Google's 2026 policies, and drive more sales.
Article Quality & Google 2026 Compliance
Discover the benefits of quality content for your business. Learn how Autoblogging.pro creates EEAT-compliant, SEO-optimized articles that rank higher and convert better. Includes case studies and real results.
📸 Screenshot: Article Quality Dashboard
Understanding Credits & Usage
Everything you need to know about credits, rollover, plans, and maximizing your subscription value.
Credits Usage Guide
Learn how credits work, which plans offer rollover, and tips to maximize your content creation. Includes detailed pricing, FAQs, and strategies to get the most value from your subscription.
📸 Screenshot: Credits Dashboard
Ready to Move Forward?
Once you've completed the basic guide, explore our advanced integration options.